

Welcome to our Autumn Art Philosophy Blog Hop!
Each month we are showcasing our amazing Art Philosophy Cricut cartridge which can be purchased exclusively through a Close to My Heart Independent Consultant.

It's the time of year where leaves are changing colors, temperatures are dropping, the days are shorter, and the holidays are quickly approaching. This month we will be featuring projects with an Autumn theme made using the Art Philosophy Cricut cartridge!
If you just happened to come to this blog, you should start at the beginning at Lucy's blog - Love 2 Create. If you came here from Lucy's blog - Love 2 Create, then you're in the right place!
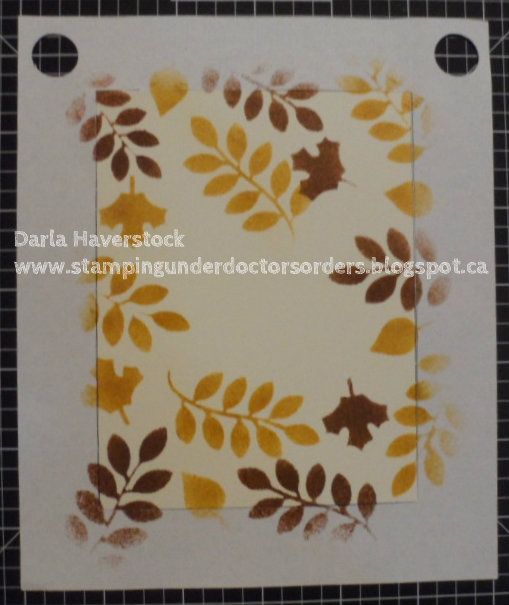
I decided to create stencils to make my background using some of the leaf and branch cuts from the Art Philosophy Cricut cartridge. The images I used can be found on pages 34, 43, 56 and 62.
Here's a photo of my finished project:
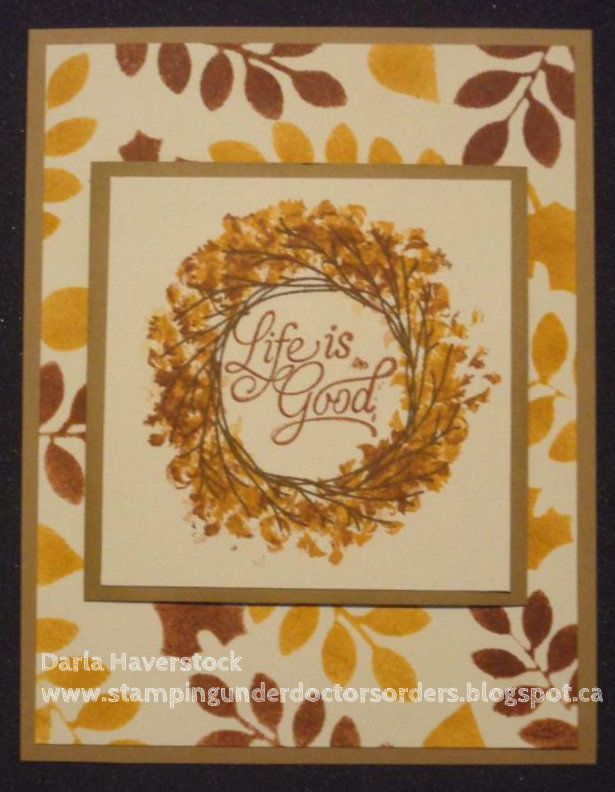
I used the Art Philosophy Cricut cartridge in Cricut Craft Room to make a stencil for the background. I used Kraft cardstock and Colonial White. I used the Remarkable Wreath stamp set and stamped the wreath base in Chocolate ink and then inked the leaves for the wreath in Goldrush and then just tapped it randomly against the corner of my Barn Red stamp pad to give it a variegated effect. I then stamped the sentiment in the center using the Barn Red again.
I used my sponge daubers and the same ink colours on my background layer with the stencils I made (more info on how I did this below), you could also use the round sponge for this too. I popped my layer of kraft with my main image on it up on foam tape to give the card a bit more dimension.
If you want to skip my little tutorial on the stencils for the background then your next stop on the hop is Diana - Dianas Free Moments, although I'd love for you to scroll down and leave me a comment on what you think before you go. ;)
If you stayed to see my tutorial... Here's how I made my background:
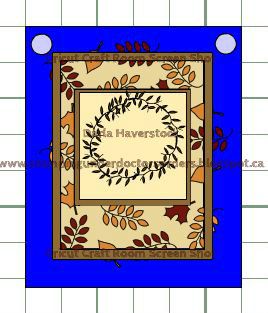
I laid out my entire layout how I wanted it to look using the layers in Cricut Craft Room. It's great doing it this way since you can change your colours around and everything of your layers so you can really see how the end project will look. I also added a larger rectangle with 2 circles in the top corners on each of the leaf layers (I have kept these out of the screen shot because once you add these you can't see your leaves anymore and I wanted you to see how it looked all laid out so I have put this same rectangle and circles on a seperate layer in blue behind everything so you can see what I mean. I used this rectangle and circles to align my stencil correctly (which you will see in the step by step photos). You can see that I also put some branches around in a circle to symbolize the stamp I used.

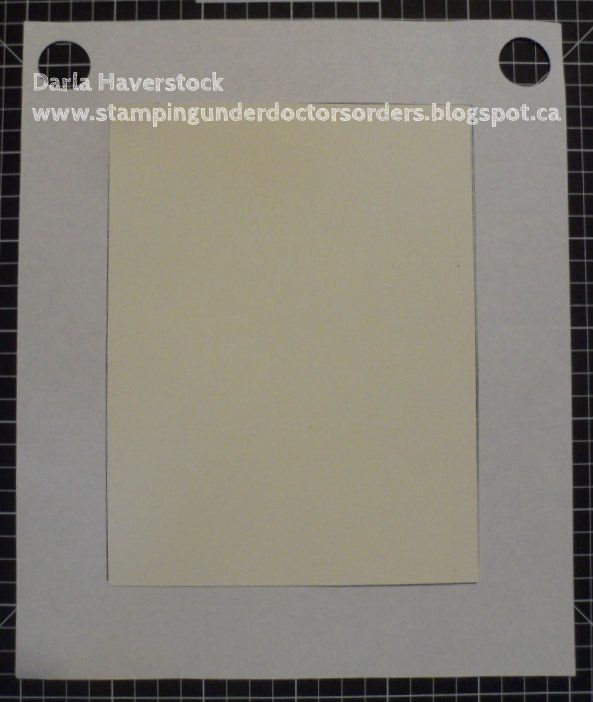
I also cut one of those same rectangles with the circles out of it with the colonial white rectangle for my pattern as well. This allowed me to stick that down on my craft mat and then I could put my cut cardstock in the opening so I knew everything would line up exactly as it did on my screen.
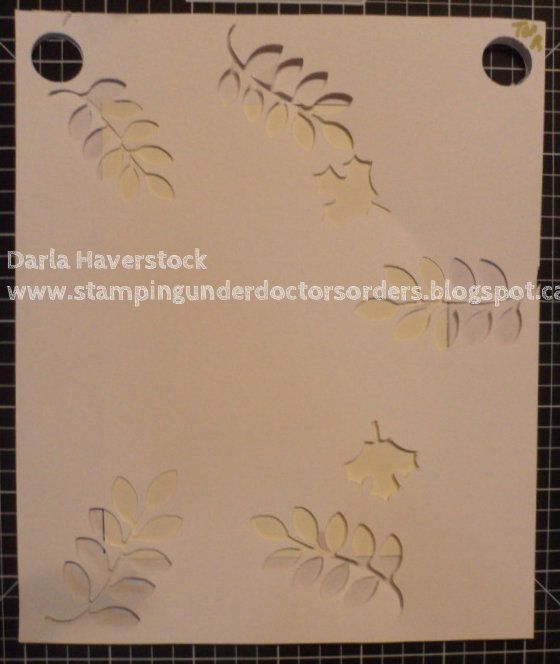
You can see my barn red one off to the side here after I removed it and my Goldrush one still in place but after I inked it.

Here's the finished background piece still in the placement holder after removing my goldrush stencil:
Finished project again:

Products Used:
Here's the entire blog hop lineup in case you "fall" off the path:
Lucy's blog - Love 2 Create
Darla - Crafting is Contagious
Diana - Dianas Free Moments Go here next
Stephanie - The Quilted Scrapper
Amie - Mimi, Myself, and I
Jennifer - 4 Hearts Scrapbooking
Rebecca - Stamp and Scrap Studio
Kindred Hearts - It Makes Total Cents
Theodora - Celebrate Crafts
Arlene - Arlene's Creative Space
Amanda - Scraps Of Love
Priscilla - Priscilla's Paperie
Ginger - Ginger's Creative Cottage
Michelle - My Flights of Fancy
Oh my gosh, what a fantastic idea! Remarkable Wreath is hand's down one of my favorite stamp sets! I need to pm you about that leaf stamp on the wreath set later...
ReplyDeleteDarla, it is beautiful!!!! I never thought to use as a stencil like that before. A whole new world just opened up to me! Thanks for sharing!!!
ReplyDeleteBRILLIANT! I would have never thought to give the mask Guide Marks. I love the layers on CCR as well - so handy! TFS!
ReplyDeleteVery cute! Thanks for sharing!!
ReplyDeleteGreat Idea, Never would of thought of that. Thanks for showing us how you did it. Love the colors in your card.
ReplyDeleteLove your card. Will have to try that technique! Thanks!
ReplyDeleteI was just going thru my stamps and wondered how the Life is good sentiment would fit in there - now I know !
ReplyDeleteWhat a great way to get a unique background! I love how you did the one with the circles too, to make sure to keep everything in line! Great job!
ReplyDeleteLove that you showed the stencil! And I've never planned the entire card on craft room and need to think to do that!! Card is cool!! Love color combos. thanks so much!
ReplyDeleteDarla,
ReplyDeleteWhat a pretty card. I loved how you showed every step.
That is a really cool way to stamp.
What beautiful fall colors.
Thanks for sharing.
Denise Gifford
very nice darla, took me a minute to figure what the holes were for, but man does that all come together beautifully!
ReplyDeleteWow. I love!
ReplyDeleteDarla, this is awesome!! Can't wait to try it. Thank you so much for sharing
ReplyDeleteLynda Eshelman
Wow Miss Darla -- outstanding! I have this stamp set but have never used it this way. Thanks also for the tutorial on the stencils for the background - TFS :)
ReplyDeleteLucy
http://love2createitall.com
Beautiful card!! Love this idea :D
ReplyDeleteThanks for the tutorial. I like the colors you chose.
ReplyDelete